3D Tutorials
3D Game Development with MonoGame
MonoGame gives you full access to the GPU through its graphics pipeline. These tutorials walk you from rendering your first 3D cube to building terrain, lighting systems, and custom shaders.
Download the runnable sample project
Use the verified ZIP bundle for this article to review the extracted example files, run the sample host, and repackage the sources without bin or obj folders.
Beginner — 3D fundamentals
Before working in 3D, make sure you have a running project from the Getting Started guide. All 3D rendering in MonoGame uses the same Game class and content pipeline.
Understanding 3D space
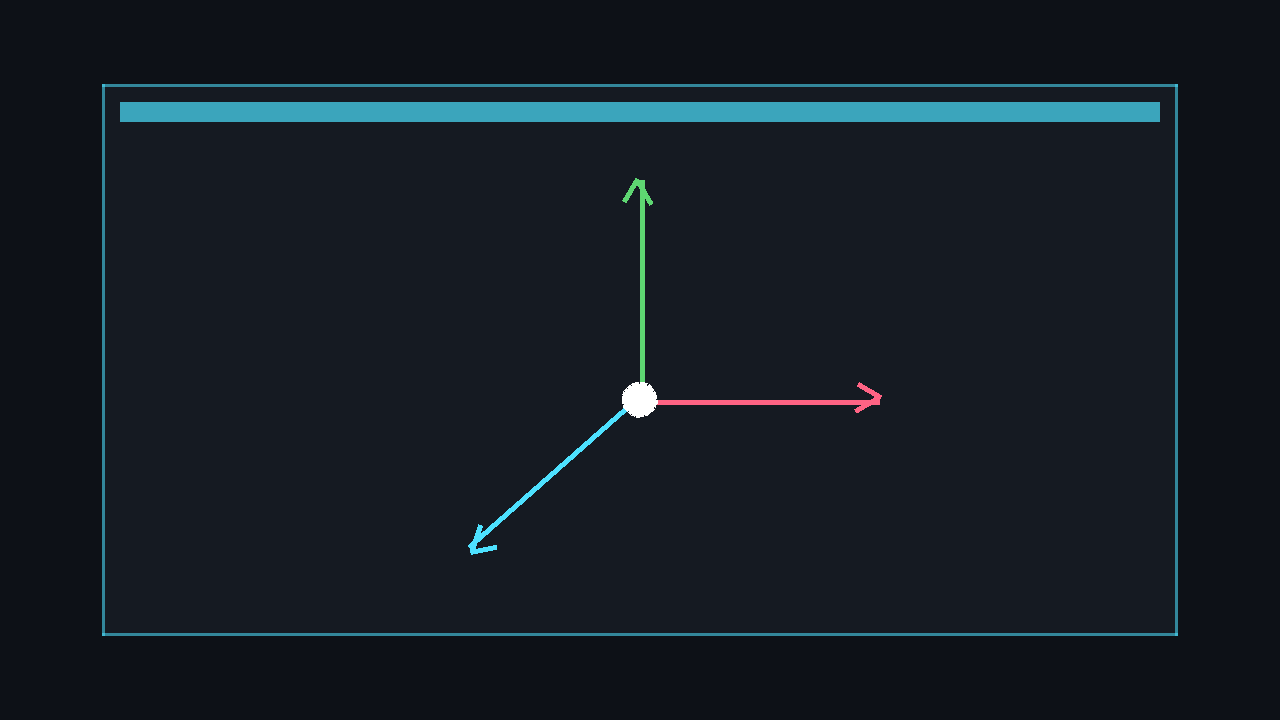
MonoGame uses a right-handed coordinate system. X points right, Y points up, and Z points towards you. Every object in the scene needs three matrices: World (position/rotation/scale), View (camera), and Projection (lens).
Drawing 3D primitives
Use VertexPositionColor to define triangle vertices, then draw them with BasicEffect. This is the simplest way to get coloured geometry on screen.
private BasicEffect _effect;
private VertexPositionColor[] _triangleVertices;

protected override void LoadContent()
{
    _effect = new BasicEffect(GraphicsDevice)
    {
        VertexColorEnabled = true,
        View = Matrix.CreateLookAt(
            new Vector3(0, 0, 5), Vector3.Zero, Vector3.Up),
        Projection = Matrix.CreatePerspectiveFieldOfView(
            MathHelper.ToRadians(45f),
            GraphicsDevice.Viewport.AspectRatio, 0.1f, 100f)
    };

    _triangleVertices = new VertexPositionColor[]
    {
        new(new Vector3( 0,  1, 0), Color.Red),
        new(new Vector3( 1, -1, 0), Color.Green),
        new(new Vector3(-1, -1, 0), Color.Blue)
    };
}

protected override void Draw(GameTime gameTime)
{
    GraphicsDevice.Clear(Color.CornflowerBlue);

    foreach (var pass in _effect.CurrentTechnique.Passes)
    {
        pass.Apply();
        GraphicsDevice.DrawUserPrimitives(
            PrimitiveType.TriangleList, _triangleVertices, 0, 1);
    }
    base.Draw(gameTime);
}
Drawing a textured cube
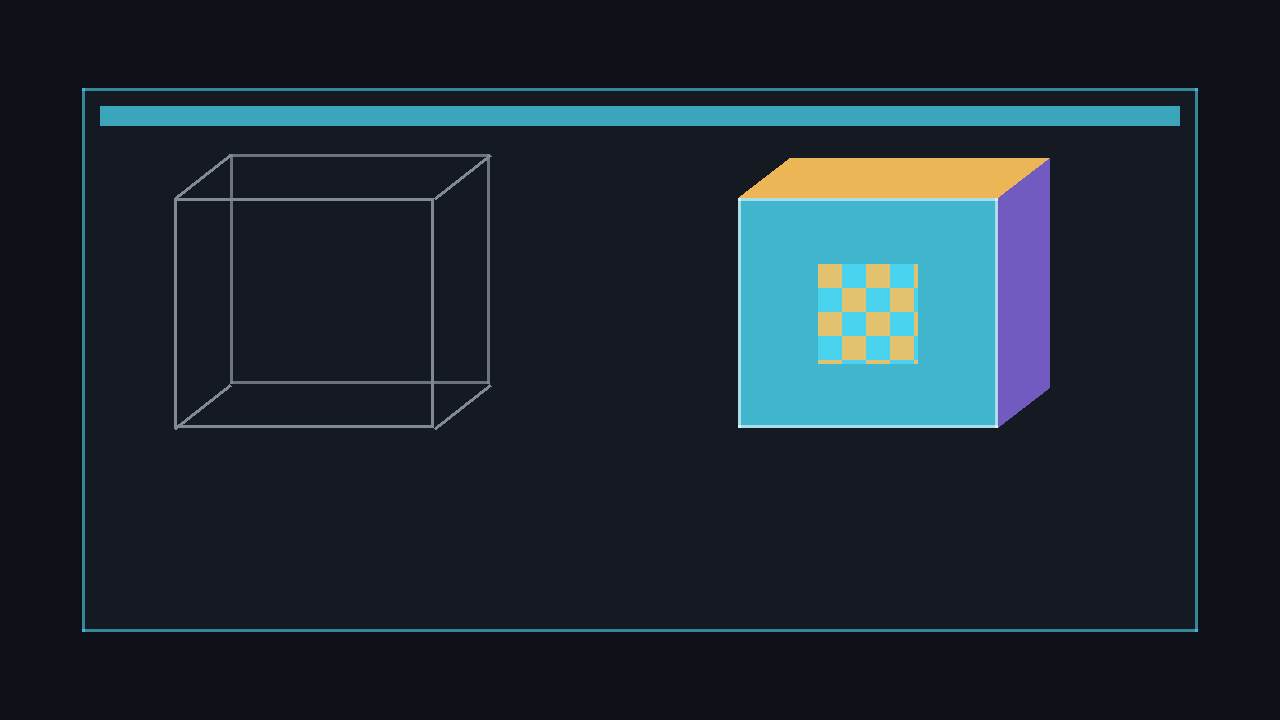
Extend the triangle approach to six faces. Use VertexPositionTexture with a loaded texture and BasicEffect.TextureEnabled.
private VertexBuffer _vertexBuffer;
private IndexBuffer _indexBuffer;
private BasicEffect _effect;
private Texture2D _crateTexture;

protected override void LoadContent()
{
    _crateTexture = Content.Load<Texture2D>("crate");

    var vertices = new VertexPositionTexture[]
    {
        // Front face
        new(new Vector3(-1, -1,  1), new Vector2(0, 1)),
        new(new Vector3( 1, -1,  1), new Vector2(1, 1)),
        new(new Vector3( 1,  1,  1), new Vector2(1, 0)),
        new(new Vector3(-1,  1,  1), new Vector2(0, 0)),
        // Back face
        new(new Vector3( 1, -1, -1), new Vector2(0, 1)),
        new(new Vector3(-1, -1, -1), new Vector2(1, 1)),
        new(new Vector3(-1,  1, -1), new Vector2(1, 0)),
        new(new Vector3( 1,  1, -1), new Vector2(0, 0)),
        // Top, Bottom, Left, Right faces follow the same pattern
    };

    var indices = new short[]
    {
        0,1,2, 0,2,3,   // Front
        4,5,6, 4,6,7,   // Back
        // ... remaining faces
    };

    _vertexBuffer = new VertexBuffer(GraphicsDevice,
        typeof(VertexPositionTexture), vertices.Length,
        BufferUsage.WriteOnly);
    _vertexBuffer.SetData(vertices);

    _indexBuffer = new IndexBuffer(GraphicsDevice,
        IndexElementSize.SixteenBits, indices.Length,
        BufferUsage.WriteOnly);
    _indexBuffer.SetData(indices);

    _effect = new BasicEffect(GraphicsDevice)
    {
        TextureEnabled = true,
        Texture = _crateTexture,
        View = Matrix.CreateLookAt(
            new Vector3(0, 2, 5), Vector3.Zero, Vector3.Up),
        Projection = Matrix.CreatePerspectiveFieldOfView(
            MathHelper.ToRadians(45f),
            GraphicsDevice.Viewport.AspectRatio, 0.1f, 100f)
    };
}

protected override void Draw(GameTime gameTime)
{
    GraphicsDevice.Clear(Color.CornflowerBlue);
    GraphicsDevice.SetVertexBuffer(_vertexBuffer);
    GraphicsDevice.Indices = _indexBuffer;

    _effect.World = Matrix.CreateRotationY(
        (float)gameTime.TotalGameTime.TotalSeconds);

    foreach (var pass in _effect.CurrentTechnique.Passes)
    {
        pass.Apply();
        GraphicsDevice.DrawIndexedPrimitives(
            PrimitiveType.TriangleList, 0, 0, 12);
    }
    base.Draw(gameTime);
}
Loading 3D models
Export models from Blender or similar tools as .fbx or .obj, add them to the content pipeline, and load with Content.Load<Model>. MonoGame processes the model with its built-in importer.
private Model _model;
private Matrix _world = Matrix.Identity;
private Matrix _view;
private Matrix _projection;

protected override void LoadContent()
{
    _model = Content.Load<Model>("ship");
    _view = Matrix.CreateLookAt(
        new Vector3(0, 5, 10), Vector3.Zero, Vector3.Up);
    _projection = Matrix.CreatePerspectiveFieldOfView(
        MathHelper.ToRadians(45f),
        GraphicsDevice.Viewport.AspectRatio, 0.1f, 1000f);
}

protected override void Draw(GameTime gameTime)
{
    GraphicsDevice.Clear(Color.CornflowerBlue);

    foreach (ModelMesh mesh in _model.Meshes)
    {
        foreach (BasicEffect effect in mesh.Effects)
        {
            effect.World = _world;
            effect.View = _view;
            effect.Projection = _projection;
            effect.EnableDefaultLighting();
        }
        mesh.Draw();
    }
    base.Draw(gameTime);
}
First-person free camera
A free camera tracks position, yaw, and pitch. Mouse delta controls rotation while WASD keys control forward/strafe movement relative to the camera’s facing direction.
public class FreeCamera
{
    public Vector3 Position { get; set; }
    public float Yaw { get; set; }
    public float Pitch { get; set; }
    public float Speed { get; set; } = 5f;
    public float Sensitivity { get; set; } = 0.005f;

    private Matrix _view;
    private Matrix _projection;

    public FreeCamera(float aspectRatio, Vector3 startPosition)
    {
        Position = startPosition;
        _projection = Matrix.CreatePerspectiveFieldOfView(
            MathHelper.ToRadians(60f), aspectRatio, 0.1f, 1000f);
    }

    public void Update(GameTime gameTime, KeyboardState kb, MouseState mouse,
                       Point screenCentre)
    {
        float dt = (float)gameTime.ElapsedGameTime.TotalSeconds;

        // Mouse look
        float dx = mouse.X - screenCentre.X;
        float dy = mouse.Y - screenCentre.Y;
        Yaw -= dx * Sensitivity;
        Pitch -= dy * Sensitivity;
        Pitch = MathHelper.Clamp(Pitch,
            MathHelper.ToRadians(-89f), MathHelper.ToRadians(89f));

        // Direction vectors
        var rotation = Matrix.CreateRotationX(Pitch) *
                       Matrix.CreateRotationY(Yaw);
        var forward = Vector3.Transform(Vector3.Forward, rotation);
        var right = Vector3.Transform(Vector3.Right, rotation);

        // Movement
        if (kb.IsKeyDown(Keys.W)) Position += forward * Speed * dt;
        if (kb.IsKeyDown(Keys.S)) Position -= forward * Speed * dt;
        if (kb.IsKeyDown(Keys.A)) Position -= right * Speed * dt;
        if (kb.IsKeyDown(Keys.D)) Position += right * Speed * dt;

        _view = Matrix.CreateLookAt(Position, Position + forward, Vector3.Up);
    }

    public Matrix View => _view;
    public Matrix Projection => _projection;
}
Intermediate — World building
With models and cameras in place, build full 3D environments with terrain, skyboxes, billboards, and proper lighting.
BasicEffect lighting
MonoGame’s BasicEffect supports three directional lights, ambient light, and specular highlights out of the box. Enable default lighting as a quick starting point, then customise individual light directions and colours.
foreach (ModelMesh mesh in _model.Meshes)
{
    foreach (BasicEffect effect in mesh.Effects)
    {
        effect.LightingEnabled = true;
        effect.AmbientLightColor = new Vector3(0.15f, 0.15f, 0.2f);
        effect.PreferPerPixelLighting = true;

        effect.DirectionalLight0.Enabled = true;
        effect.DirectionalLight0.Direction =
            Vector3.Normalize(new Vector3(-1, -1, -0.5f));
        effect.DirectionalLight0.DiffuseColor = new Vector3(1f, 0.95f, 0.8f);
        effect.DirectionalLight0.SpecularColor = new Vector3(0.3f, 0.3f, 0.3f);

        effect.DirectionalLight1.Enabled = true;
        effect.DirectionalLight1.Direction =
            Vector3.Normalize(new Vector3(0.5f, -0.3f, 1f));
        effect.DirectionalLight1.DiffuseColor = new Vector3(0.3f, 0.35f, 0.5f);

        effect.World = _world;
        effect.View = _camera.View;
        effect.Projection = _camera.Projection;
    }
    mesh.Draw();
}
Heightmap terrain
Load a greyscale image as a heightmap. Each pixel’s brightness becomes a vertex height. Build a triangle strip or indexed mesh from the resulting grid and apply a grass or rock texture.
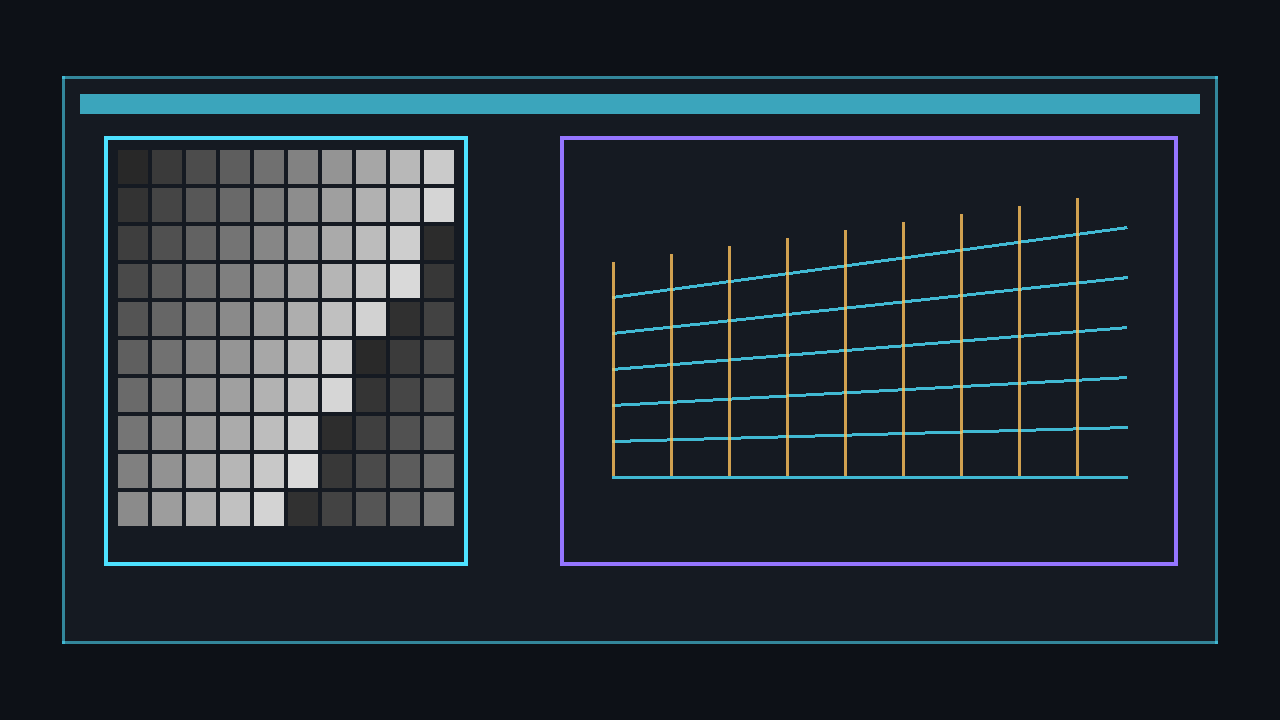
private VertexPositionNormalTexture[] _terrainVertices;
private int[] _terrainIndices;
private int _terrainWidth, _terrainHeight;

private void LoadHeightmap(Texture2D heightmap, float heightScale)
{
    _terrainWidth = heightmap.Width;
    _terrainHeight = heightmap.Height;
    var heightData = new Color[_terrainWidth * _terrainHeight];
    heightmap.GetData(heightData);

    _terrainVertices = new VertexPositionNormalTexture[
        _terrainWidth * _terrainHeight];

    for (int z = 0; z < _terrainHeight; z++)
    for (int x = 0; x < _terrainWidth; x++)
    {
        float y = heightData[z * _terrainWidth + x].R / 255f * heightScale;
        int i = z * _terrainWidth + x;
        _terrainVertices[i] = new VertexPositionNormalTexture(
            new Vector3(x, y, z),
            Vector3.Up,
            new Vector2(x / (float)_terrainWidth,
                        z / (float)_terrainHeight));
    }

    // Build indices for triangle list
    var indices = new List<int>();
    for (int z = 0; z < _terrainHeight - 1; z++)
    for (int x = 0; x < _terrainWidth - 1; x++)
    {
        int tl = z * _terrainWidth + x;
        int tr = tl + 1;
        int bl = tl + _terrainWidth;
        int br = bl + 1;
        indices.AddRange(new[] { tl, bl, tr, tr, bl, br });
    }
    _terrainIndices = indices.ToArray();

    CalculateNormals();
}

private void CalculateNormals()
{
    for (int i = 0; i < _terrainIndices.Length; i += 3)
    {
        var v0 = _terrainVertices[_terrainIndices[i]].Position;
        var v1 = _terrainVertices[_terrainIndices[i + 1]].Position;
        var v2 = _terrainVertices[_terrainIndices[i + 2]].Position;
        var normal = Vector3.Cross(v1 - v0, v2 - v0);
        normal.Normalize();
        _terrainVertices[_terrainIndices[i]].Normal += normal;
        _terrainVertices[_terrainIndices[i + 1]].Normal += normal;
        _terrainVertices[_terrainIndices[i + 2]].Normal += normal;
    }
    for (int i = 0; i < _terrainVertices.Length; i++)
        _terrainVertices[i].Normal.Normalize();
}
Skybox rendering
A skybox is a large cube with inward-facing textures drawn before everything else. Disable depth writing so it always appears behind all other geometry. Use six separate face textures or a cube map.
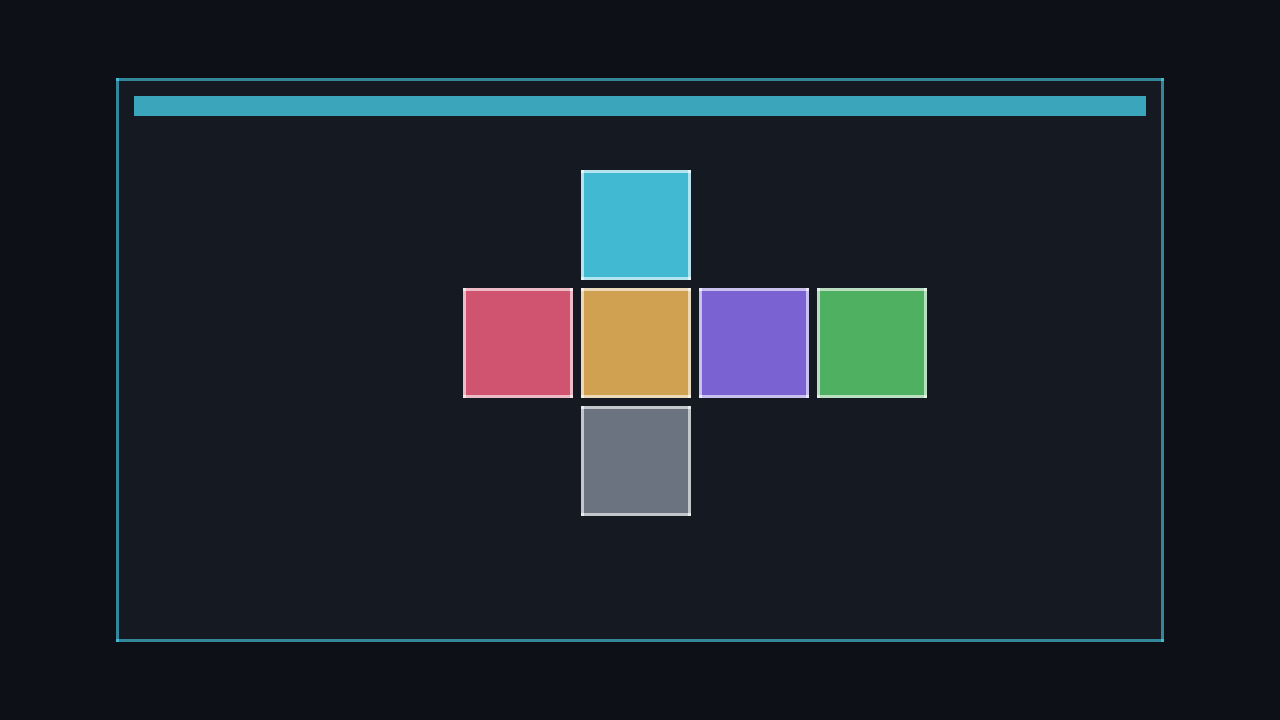
public class Skybox
{
    private Model _cube;
    private TextureCube _texture;
    private Effect _skyboxEffect;

    public Skybox(Model cube, TextureCube texture, Effect effect)
    {
        _cube = cube;
        _texture = texture;
        _skyboxEffect = effect;
    }

    public void Draw(Matrix view, Matrix projection, Vector3 cameraPosition)
    {
        var previousDepth = GraphicsDevice.DepthStencilState;
        GraphicsDevice.DepthStencilState = DepthStencilState.None;

        _skyboxEffect.Parameters["ViewMatrix"].SetValue(view);
        _skyboxEffect.Parameters["ProjectionMatrix"].SetValue(projection);
        _skyboxEffect.Parameters["SkyboxTexture"].SetValue(_texture);

        foreach (ModelMesh mesh in _cube.Meshes)
        {
            foreach (ModelMeshPart part in mesh.MeshParts)
            {
                part.Effect = _skyboxEffect;
            }
            mesh.Draw();
        }

        GraphicsDevice.DepthStencilState = previousDepth;
    }
}
Billboards and imposters
Billboards are textured quads that always face the camera. Use them for trees, particles, lens flares, and distant objects where full 3D models would be wasteful.
public static Matrix CreateBillboard(
    Vector3 objectPosition, Vector3 cameraPosition,
    Vector3 cameraUp)
{
    Vector3 look = cameraPosition - objectPosition;
    look.Normalize();
    Vector3 right = Vector3.Cross(cameraUp, look);
    right.Normalize();
    Vector3 up = Vector3.Cross(look, right);

    return new Matrix(
        right.X, right.Y, right.Z, 0,
        up.X, up.Y, up.Z, 0,
        look.X, look.Y, look.Z, 0,
        objectPosition.X, objectPosition.Y, objectPosition.Z, 1);
}

// Usage: set the effect's World matrix to CreateBillboard(...)
// then draw a single quad with the tree or particle texture.
Bounding volume collision
MonoGame provides BoundingBox, BoundingSphere, and BoundingFrustum. Use them for broad-phase collision, frustum culling, and ray-pick interaction.
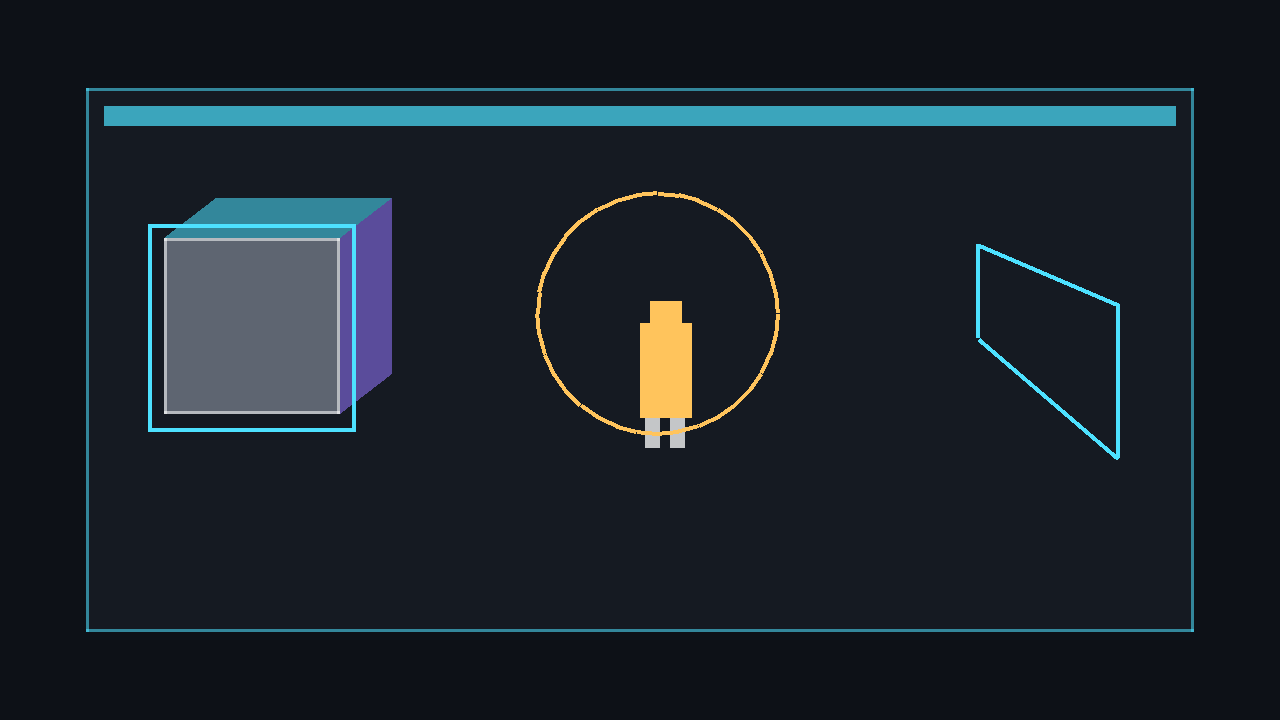
// Extract model bounding sphere
BoundingSphere GetModelBounds(Model model, Matrix world)
{
    var sphere = new BoundingSphere();
    foreach (var mesh in model.Meshes)
        sphere = BoundingSphere.CreateMerged(
            sphere, mesh.BoundingSphere.Transform(world));
    return sphere;
}

// Sphere-sphere collision
BoundingSphere a = GetModelBounds(_player, _playerWorld);
BoundingSphere b = GetModelBounds(_enemy, _enemyWorld);
bool hit = a.Intersects(b);

// Frustum culling
BoundingFrustum frustum = new BoundingFrustum(_view * _projection);
if (frustum.Contains(a) != ContainmentType.Disjoint)
{
    // Object is visible, draw it
}

// Ray picking (mouse click to world)
var nearPoint = GraphicsDevice.Viewport.Unproject(
    new Vector3(mouse.X, mouse.Y, 0),
    _projection, _view, Matrix.Identity);
var farPoint = GraphicsDevice.Viewport.Unproject(
    new Vector3(mouse.X, mouse.Y, 1),
    _projection, _view, Matrix.Identity);
Ray pickRay = new Ray(nearPoint,
    Vector3.Normalize(farPoint - nearPoint));
3D positional audio
Use AudioEmitter and AudioListener with SoundEffectInstance for spatial audio that pans and attenuates based on the listener’s position relative to the emitter.
private AudioListener _listener = new AudioListener();
private AudioEmitter _emitter = new AudioEmitter();
private SoundEffectInstance _engineSound;

protected override void LoadContent()
{
    var sfx = Content.Load<SoundEffect>("engine_loop");
    _engineSound = sfx.CreateInstance();
    _engineSound.IsLooped = true;
    _engineSound.Play();
}

protected override void Update(GameTime gameTime)
{
    _listener.Position = _camera.Position;
    _listener.Forward = _camera.Forward;
    _listener.Up = Vector3.Up;

    _emitter.Position = _vehiclePosition;
    _engineSound.Apply3D(_listener, _emitter);

    base.Update(gameTime);
}
Advanced — Rendering mastery
These tutorials cover advanced rendering techniques that require HLSL shader knowledge and a solid understanding of the MonoGame graphics pipeline.

Custom HLSL effects
Move beyond BasicEffect by writing your own .fx shaders. Define vertex and pixel shader functions, compile through the content pipeline, and apply via Effect.
float4x4 World;
float4x4 View;
float4x4 Projection;
float3 LightDirection = float3(-1, -1, -0.5);
float3 LightColor = float3(1, 0.95, 0.8);
float3 AmbientColor = float3(0.15, 0.15, 0.2);

texture DiffuseMap;
sampler DiffuseSampler = sampler_state
{
    Texture = (DiffuseMap);
    MinFilter = Linear;
    MagFilter = Linear;
    MipFilter = Linear;
};

struct VSInput
{
    float4 Position : POSITION0;
    float3 Normal   : NORMAL0;
    float2 TexCoord : TEXCOORD0;
};

struct VSOutput
{
    float4 Position : POSITION0;
    float2 TexCoord : TEXCOORD0;
    float3 Normal   : TEXCOORD1;
};

VSOutput VertexShaderFunction(VSInput input)
{
    VSOutput output;
    float4 worldPos = mul(input.Position, World);
    output.Position = mul(mul(worldPos, View), Projection);
    output.TexCoord = input.TexCoord;
    output.Normal = normalize(mul(input.Normal, (float3x3)World));
    return output;
}

float4 PixelShaderFunction(VSOutput input) : COLOR0
{
    float3 normal = normalize(input.Normal);
    float ndotl = max(dot(normal, -normalize(LightDirection)), 0);
    float3 diffuse = LightColor * ndotl;
    float3 light = AmbientColor + diffuse;
    float4 texColor = tex2D(DiffuseSampler, input.TexCoord);
    return float4(texColor.rgb * light, texColor.a);
}

technique Default
{
    pass Pass0
    {
        VertexShader = compile vs_3_0 VertexShaderFunction();
        PixelShader = compile ps_3_0 PixelShaderFunction();
    }
}
Normal mapping
Normal maps add surface detail without extra geometry. Sample the normal from a texture in tangent space, transform it to world space, and use it for lighting instead of the interpolated vertex normal.
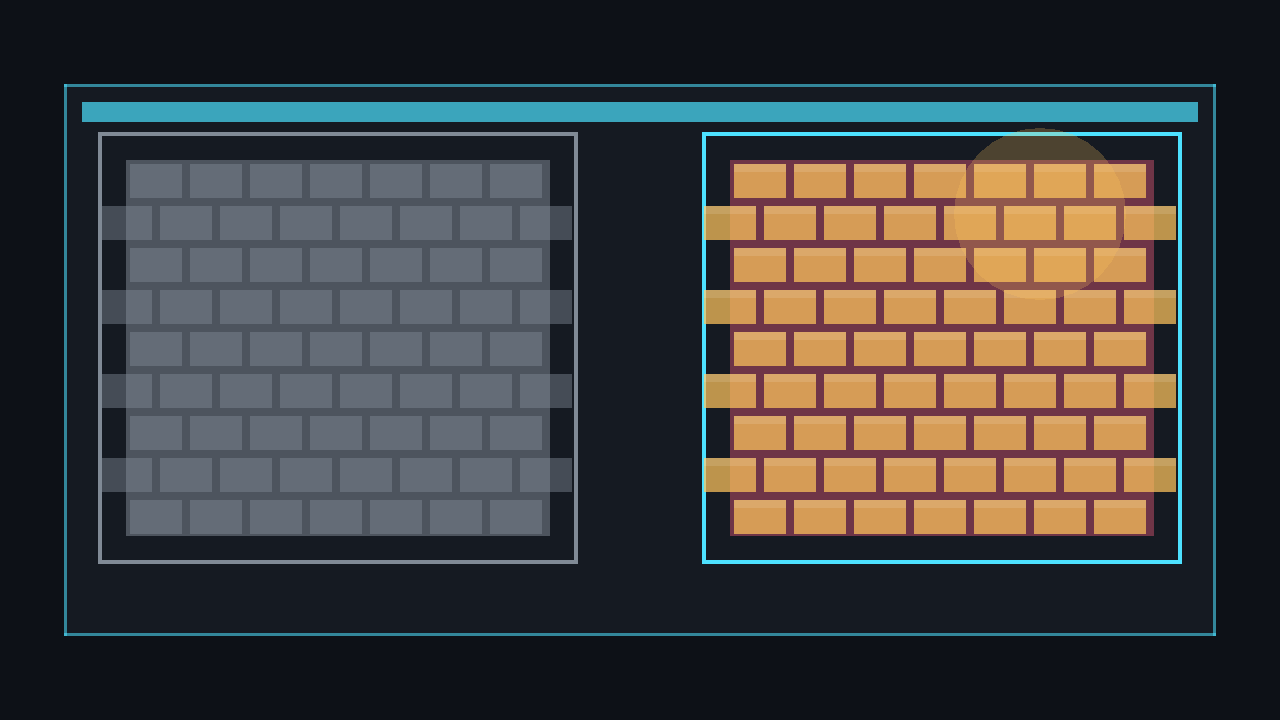
texture NormalMap;
sampler NormalSampler = sampler_state
{
    Texture = (NormalMap);
    MinFilter = Linear;
    MagFilter = Linear;
};

// In the vertex shader, pass tangent and binormal alongside the normal.
// In the pixel shader:
float4 PixelShaderFunction(VSOutput input) : COLOR0
{
    float3 normalSample = tex2D(NormalSampler, input.TexCoord).rgb;
    normalSample = normalSample * 2.0 - 1.0; // unpack from [0,1] to [-1,1]

    // Transform from tangent space to world space
    float3x3 tbn = float3x3(input.Tangent, input.Binormal, input.Normal);
    float3 worldNormal = normalize(mul(normalSample, tbn));

    float ndotl = max(dot(worldNormal, -normalize(LightDirection)), 0);
    float3 diffuse = LightColor * ndotl;
    float4 texColor = tex2D(DiffuseSampler, input.TexCoord);
    return float4(texColor.rgb * (AmbientColor + diffuse), texColor.a);
}
Shadow mapping
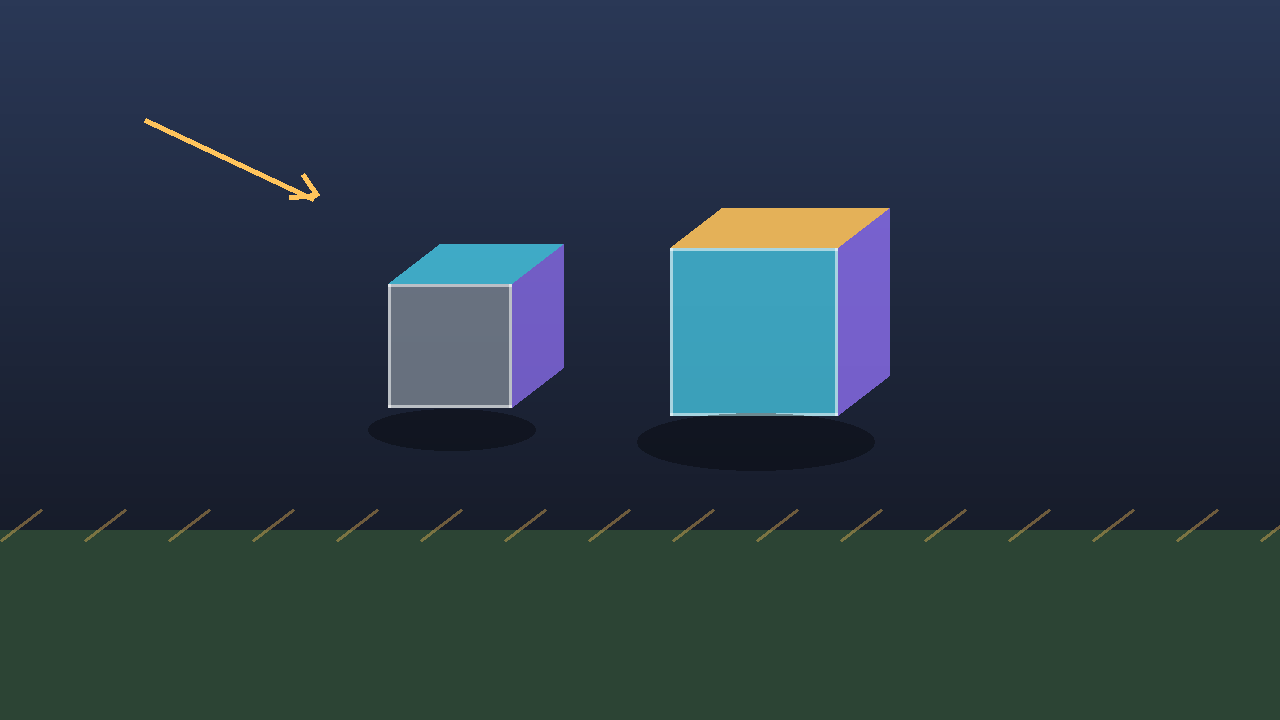
Render the scene from the light’s perspective into a depth-only render target (shadow map). In the main pass, compare each fragment’s depth against the shadow map to determine if it is in shadow.
private RenderTarget2D _shadowMap;
private Matrix _lightView;
private Matrix _lightProjection;

protected override void Initialize()
{
    _shadowMap = new RenderTarget2D(GraphicsDevice,
        2048, 2048, false, SurfaceFormat.Single,
        DepthFormat.Depth24);

    _lightView = Matrix.CreateLookAt(
        _lightPosition, Vector3.Zero, Vector3.Up);
    _lightProjection = Matrix.CreateOrthographic(
        50f, 50f, 1f, 100f);

    base.Initialize();
}

protected override void Draw(GameTime gameTime)
{
    // Pass 1: Render depth from light's view
    GraphicsDevice.SetRenderTarget(_shadowMap);
    GraphicsDevice.Clear(Color.White);
    DrawSceneDepthOnly(_lightView, _lightProjection);

    // Pass 2: Render scene with shadow comparison
    GraphicsDevice.SetRenderTarget(null);
    GraphicsDevice.Clear(Color.CornflowerBlue);
    _shadowEffect.Parameters["ShadowMap"].SetValue(_shadowMap);
    _shadowEffect.Parameters["LightViewProjection"].SetValue(
        _lightView * _lightProjection);
    DrawSceneWithShadows(_camera.View, _camera.Projection);

    base.Draw(gameTime);
}
Instanced rendering
Draw thousands of identical meshes (trees, grass, debris) in a single draw call. Define a second vertex buffer with per-instance world matrices and use DrawInstancedPrimitives.
struct InstanceData
{
    public Matrix World;
}

private VertexBuffer _instanceBuffer;

private void SetupInstances(InstanceData[] instances)
{
    var declaration = new VertexDeclaration(
        new VertexElement(0, VertexElementFormat.Vector4,
            VertexElementUsage.TextureCoordinate, 1),
        new VertexElement(16, VertexElementFormat.Vector4,
            VertexElementUsage.TextureCoordinate, 2),
        new VertexElement(32, VertexElementFormat.Vector4,
            VertexElementUsage.TextureCoordinate, 3),
        new VertexElement(48, VertexElementFormat.Vector4,
            VertexElementUsage.TextureCoordinate, 4)
    );

    _instanceBuffer = new VertexBuffer(GraphicsDevice,
        declaration, instances.Length, BufferUsage.WriteOnly);
    _instanceBuffer.SetData(instances);
}

// In Draw, bind both buffers:
GraphicsDevice.SetVertexBuffers(
    new VertexBufferBinding(_meshVertexBuffer, 0, 0),
    new VertexBufferBinding(_instanceBuffer, 0, 1));
GraphicsDevice.Indices = _meshIndexBuffer;
GraphicsDevice.DrawInstancedPrimitives(
    PrimitiveType.TriangleList, 0, 0,
    _meshTriangleCount, _instanceCount);
Deferred rendering overview
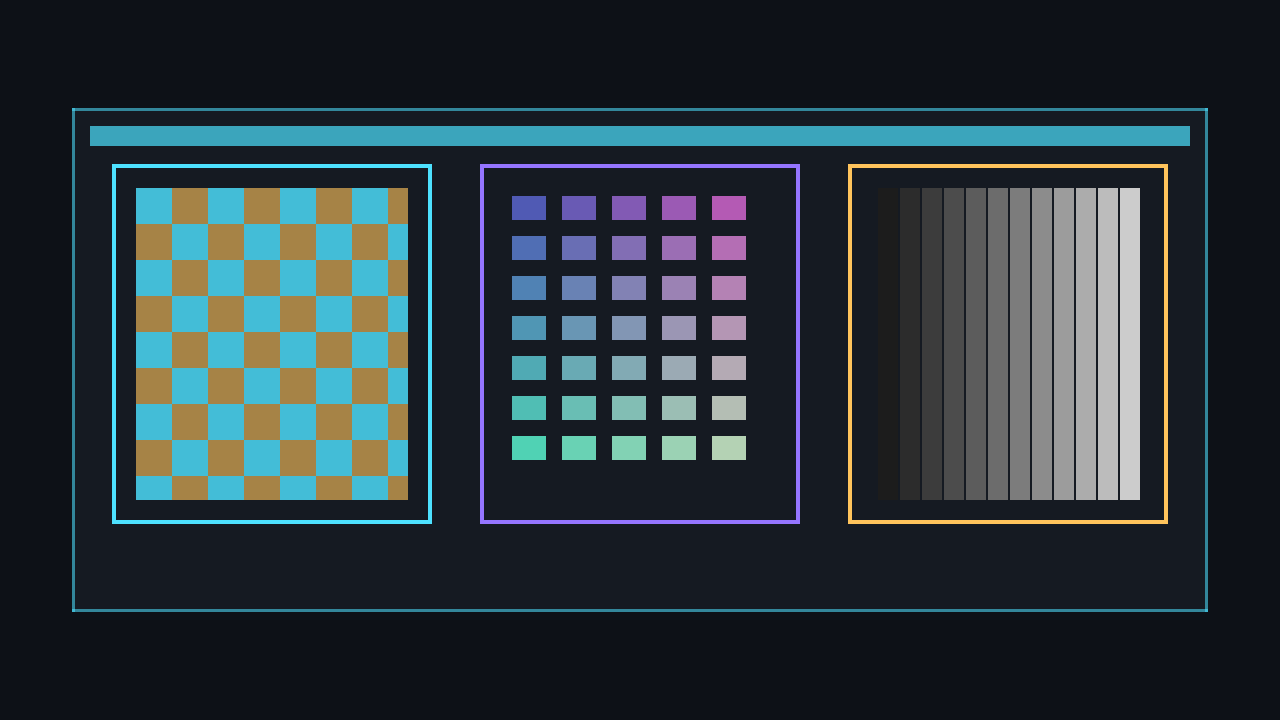
Deferred rendering separates geometry from lighting. In the geometry pass, output albedo, normals, and depth to multiple render targets (G-buffer). In the lighting pass, read the G-buffer and compute lighting per pixel. This allows dozens or hundreds of lights without re-drawing geometry.
private RenderTarget2D _albedoTarget;
private RenderTarget2D _normalTarget;
private RenderTarget2D _depthTarget;

protected override void Initialize()
{
    int w = GraphicsDevice.Viewport.Width;
    int h = GraphicsDevice.Viewport.Height;

    _albedoTarget = new RenderTarget2D(GraphicsDevice, w, h,
        false, SurfaceFormat.Color, DepthFormat.Depth24);
    _normalTarget = new RenderTarget2D(GraphicsDevice, w, h,
        false, SurfaceFormat.Color, DepthFormat.None);
    _depthTarget = new RenderTarget2D(GraphicsDevice, w, h,
        false, SurfaceFormat.Single, DepthFormat.None);
    base.Initialize();
}

// Geometry pass: bind all three targets
GraphicsDevice.SetRenderTargets(
    new RenderTargetBinding(_albedoTarget),
    new RenderTargetBinding(_normalTarget),
    new RenderTargetBinding(_depthTarget));
GraphicsDevice.Clear(Color.Transparent);
DrawSceneGeometry();

// Lighting pass: read G-buffer, output lit scene
GraphicsDevice.SetRenderTarget(null);
_lightEffect.Parameters["AlbedoMap"].SetValue(_albedoTarget);
_lightEffect.Parameters["NormalMap"].SetValue(_normalTarget);
_lightEffect.Parameters["DepthMap"].SetValue(_depthTarget);
foreach (var light in _pointLights)
    DrawLightVolume(light);
Post-processing pipeline
Chain effects like bloom, tone mapping, FXAA, and colour grading by rendering to intermediate targets. Each effect reads the previous target and writes to the next.
private RenderTarget2D _sceneTarget;
private RenderTarget2D _bloomTarget;
private Effect _bloomExtract;
private Effect _gaussianBlur;
private Effect _bloomCombine;

protected override void Draw(GameTime gameTime)
{
    // 1. Render scene to off-screen target
    GraphicsDevice.SetRenderTarget(_sceneTarget);
    GraphicsDevice.Clear(Color.CornflowerBlue);
    DrawScene();

    // 2. Extract bright areas
    GraphicsDevice.SetRenderTarget(_bloomTarget);
    _spriteBatch.Begin(effect: _bloomExtract);
    _spriteBatch.Draw(_sceneTarget, Vector2.Zero, Color.White);
    _spriteBatch.End();

    // 3. Blur the bright areas
    GraphicsDevice.SetRenderTarget(_bloomTarget);
    _spriteBatch.Begin(effect: _gaussianBlur);
    _spriteBatch.Draw(_bloomTarget, Vector2.Zero, Color.White);
    _spriteBatch.End();

    // 4. Combine scene + bloom and present
    GraphicsDevice.SetRenderTarget(null);
    _bloomCombine.Parameters["BloomTexture"].SetValue(_bloomTarget);
    _spriteBatch.Begin(effect: _bloomCombine);
    _spriteBatch.Draw(_sceneTarget, Vector2.Zero, Color.White);
    _spriteBatch.End();

    base.Draw(gameTime);
}
Continue with 2D tutorials, learn about platform setup, or read about game architecture patterns.